Kubernetes agent targets are a mechanism for executing Kubernetes steps from inside the target Kubernetes cluster, rather than via an external API connection.
Similar to the Octopus Tentacle, the Kubernetes agent is a small, lightweight application that is installed into the target Kubernetes cluster.
Benefits of the Kubernetes agent
The Kubernetes agent provides a number of improvements over the Kubernetes API target:
Polling communication
The agent uses the same polling communication protocol as Octopus Tentacle. It lets the agent initiate the connection from the cluster to Octopus Server, solving network access issues such as publicly addressable clusters..
In-cluster authentication
As the agent is already running inside the target cluster, Octopus Server no longer needs authentication credentials to the cluster to perform deployments. It can use the in-cluster authentication support of Kubernetes to run deployments using Kubernetes Service Accounts and Kubernetes RBAC local to the cluster.
Cluster-aware tooling
As the agent is running in the cluster, it can retrieve the cluster’s version and correctly use tooling that’s specific to that version. You also need a lot less tooling as there are no longer any requirements for custom authentication plugins.
Requirements
The Kubernetes agent is supported on the following versions:
- Octopus Server 2024.2.6580 or newer
- Kubernetes 1.26 to 1.29 (inclusive)
Additionally, the Kubernetes agent only supports Linux AMD64 and Linux ARM64 Kubernetes nodes.
Installing the Kubernetes agent
The Kubernetes agent is installed using Helm via the octopusdeploy/kubernetes-agent chart.
To simplify this, there is an installation wizard in Octopus to generate the required values.
Helm will use your current kubectl config, so make sure your kubectl config is pointing to the correct cluster before executing the following helm commands. You can see the current kubectl config by executing:
kubectl config viewConfiguration
- Navigate to Infrastructure ➜ Deployment Targets, and click Add Deployment Target.
- Select KUBERNETES and click ADD on the Kubernetes Agent card.
- This launches the Add New Kubernetes Agent dialog
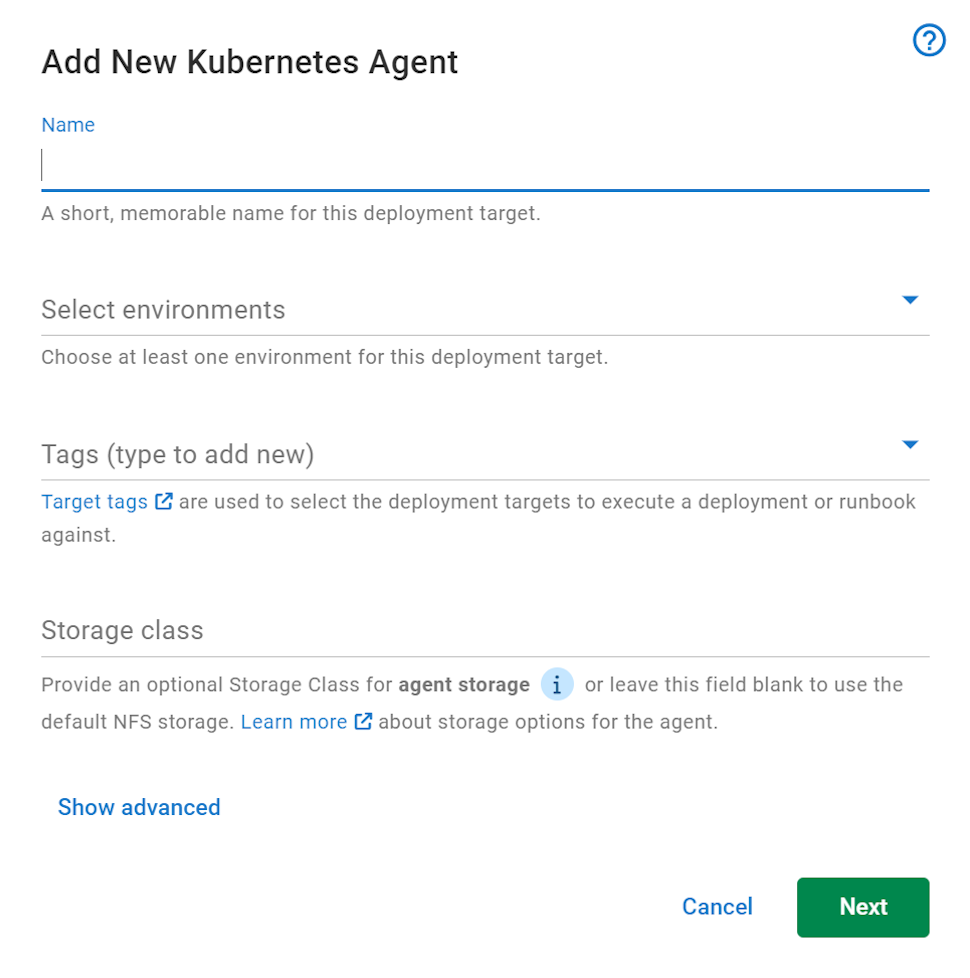
- Enter a unique display name for the target. This name is used to generate the Kubernetes namespace, as well as the Helm release name
- Select at least one environment for the target.
- Select at least one target tag for the target.
- Optionally, add the name of an existing Storage Class for the agent to use. The storage class must support the ReadWriteMany access mode.
If no storage class name is added, the default Network File System (NFS) storage will be used.
Advanced options

You can choose a default Kubernetes namespace that resources are deployed to. This is only used if the step configuration or Kubernetes manifests don’t specify a namespace.
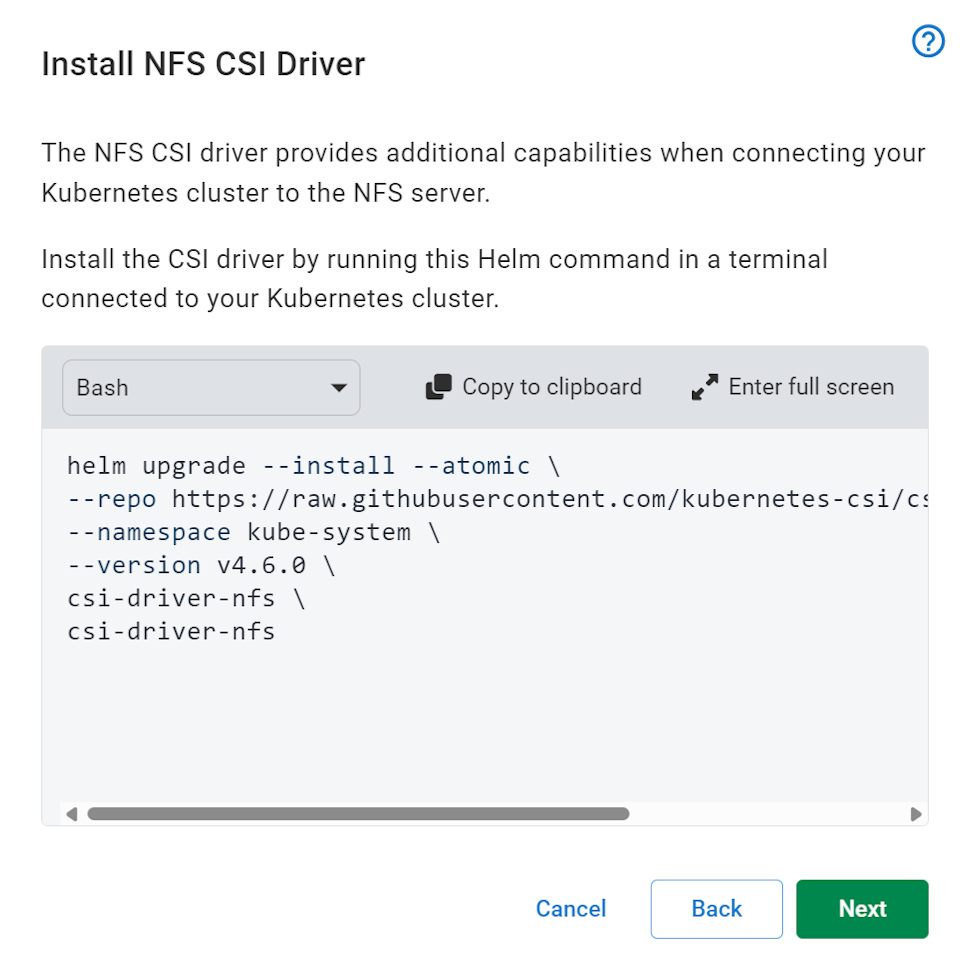
NFS CSI driver
If no Storage Class name is set, the default NFS storage pod will be used. This runs a small NFS pod next to the agent pod and provides shared storage to the agent and script pods.
A requirement of using the NFS pod is the installation of the NFS CSI Driver. This can be achieved by executing the presented helm command in a terminal connected to the target Kubernetes cluster.
Installation helm command
At the end of the wizard, Octopus generates a Helm command that you copy and paste into a terminal connected to the target cluster. After it’s executed, Helm installs all the required resources and starts the agent.
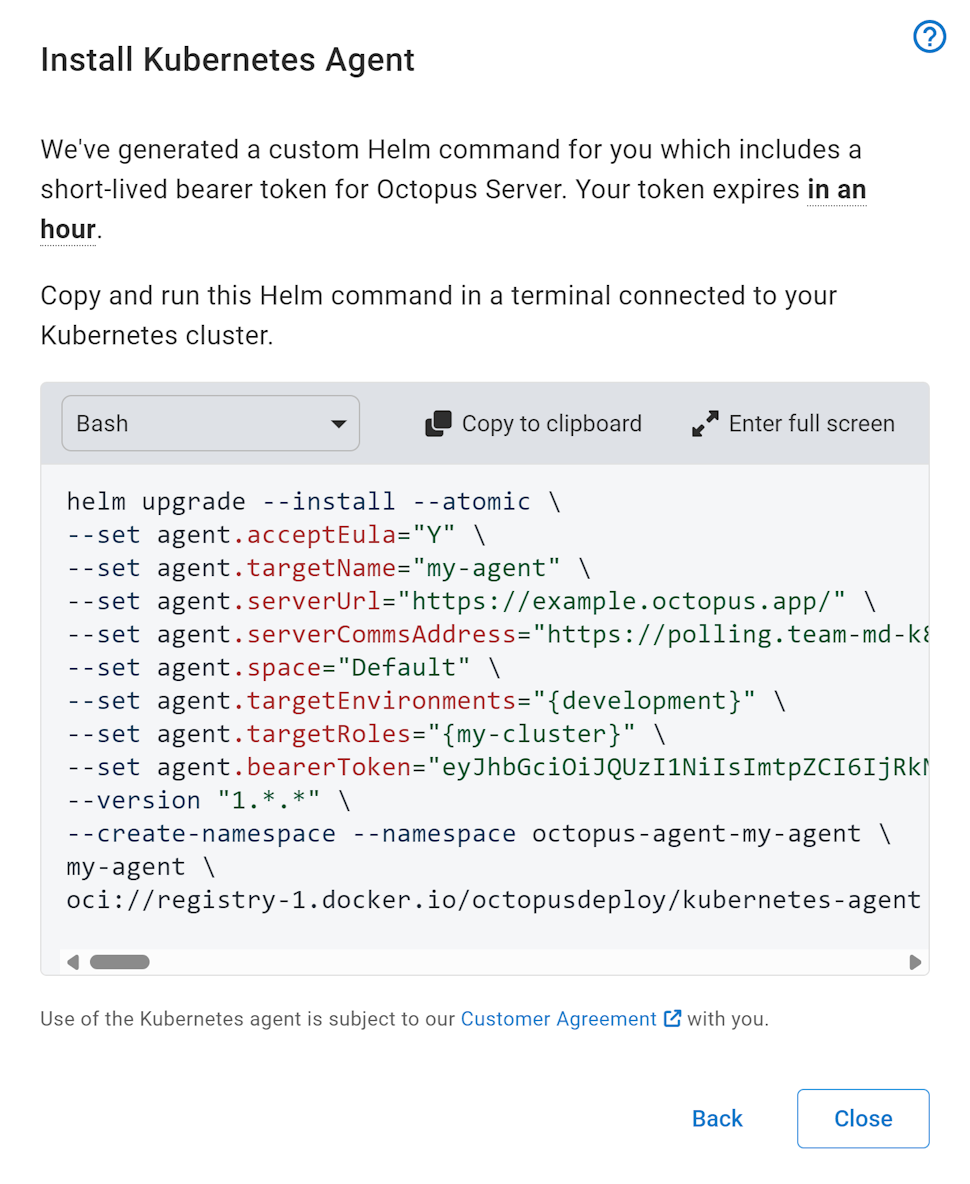
The helm command includes a 1 hour bearer token that is used when the agent first initializes, to register itself with Octopus Server.
The terminal Kubernetes context must have enough permissions to create namespaces and install resources into that namespace. If you wish to install the agent into an existing namespace, remove the --create-namespace flag and change the value after --namespace
If left open, the installation dialog waits for the agent to establish a connection and run a health check. Once successful, the Kubernetes agent target is ready for use!
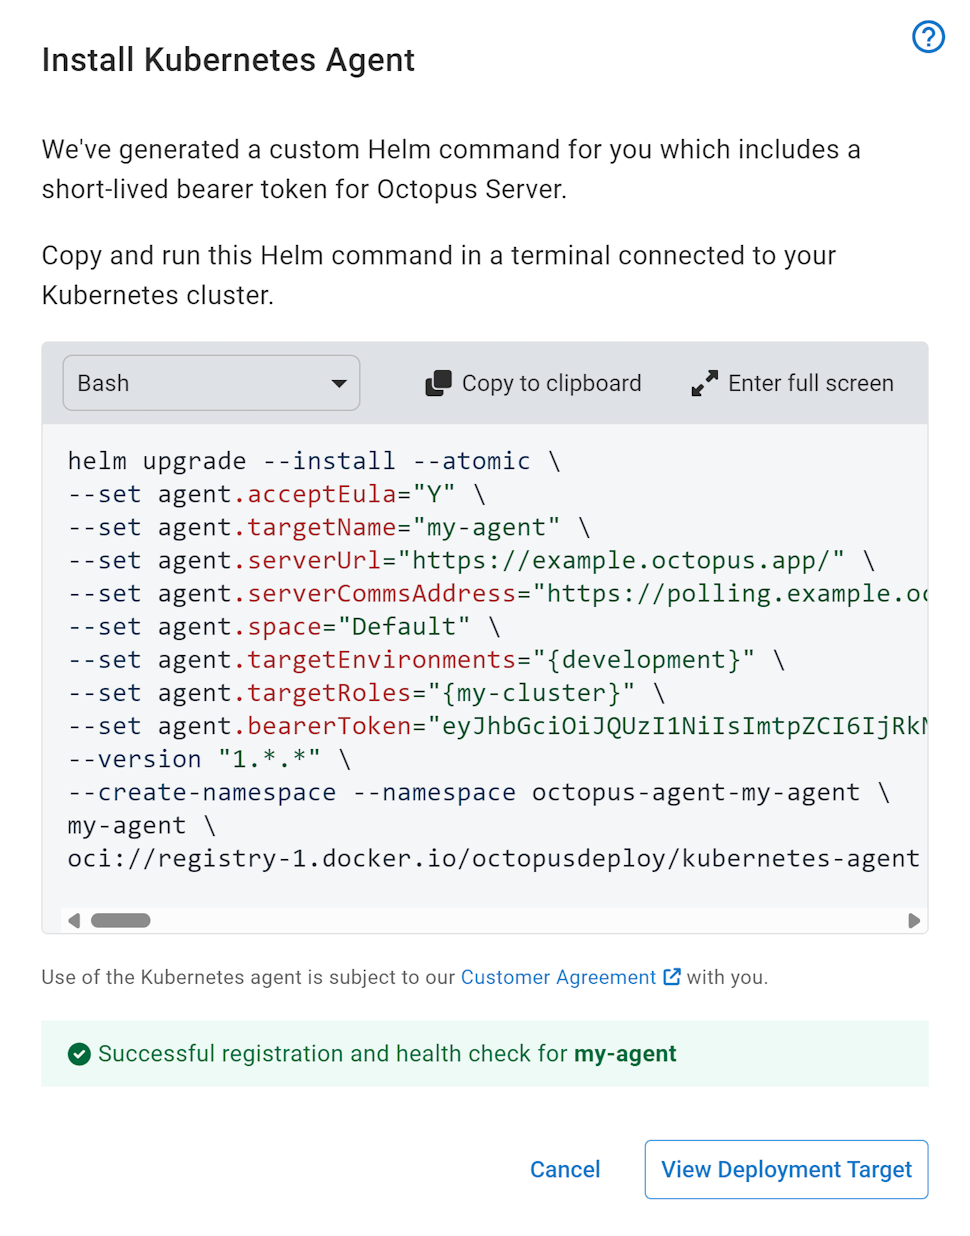
A successful health check indicates that deployments can successfully be executed.
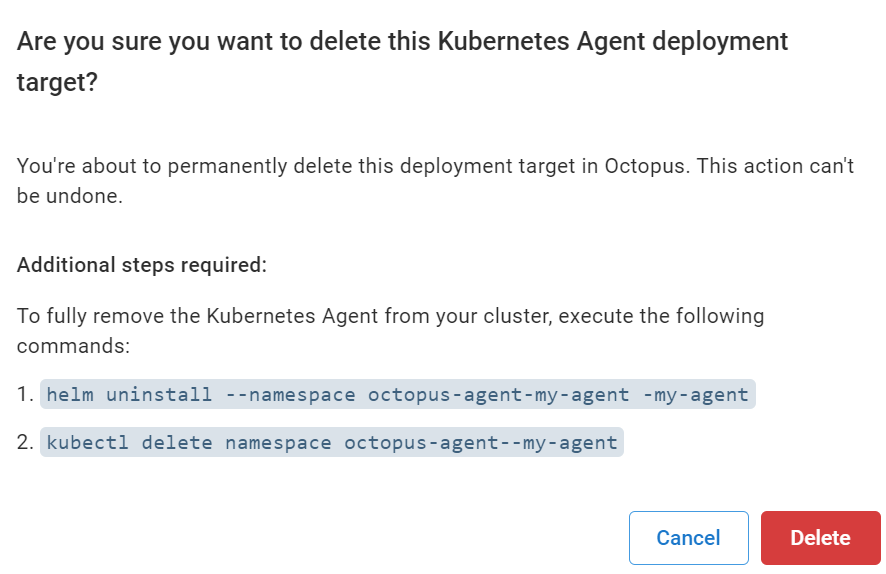
Uninstalling the Kubernetes agent
To fully remove the Kubernetes agent, you need to delete the agent from the Kubernetes cluster as well as delete the deployment target from Octopus Deploy
The deployment target deletion confirmation dialog will provide you with the commands to delete the agent from the cluster.Once these have been successfully executed, you can then click Delete and delete the deployment target.
Troubleshooting
Helm command fails with context deadline exceeded
The generated helm commands use the --atomic flag, which automatically rollbacks the changes if it fails to execute within a specified timeout (default 5 min).
If the helm command fails, then it may print an error message containing context deadline exceeded This indicates that the timeout was exceeded and the Kubernetes resources did not correctly start.
To help diagnose these issues, the kubectl command describe can be used while the helm command is executing to help debug any issues.
NFS install command
kubectl describe pods -l app.kubernetes.io/name=csi-driver-nfs -n kube-systemAgent install command
kubectl describe pods -l app.kubernetes.io/name=octopus-agent -n [NAMESPACE]Replace [NAMESPACE] with the namespace in the agent installation command
Help us continuously improve
Please let us know if you have any feedback about this page.
Page updated on Monday, April 22, 2024